
Vietnamese coffee and ice cream are two of my family’s favorite foods, so it made sense to try and make some at home. Since one of the girls is allergic to eggs, I made the ice cream eggless. The ice cream base is made with half and half and sweetened with condensed milk. Usually Vietnamese-style coffee is made with boiling water, but the half and half produces a much richer mouth-feel. Coffee made with water could make a nice sorbet, but that’s a different recipe!
As I mentioned previously, making Vietnamese coffee (cà phê sữa in Vietnamese) reminds me of mon papa (I usually call him Papounet). When I was a little girl growing up in Paris, I would make coffee and bring breakfast to my dad every morning. Making the coffee for the ice cream took me back in time. If you cook long enough, food will have that power over you too.
1. Info for Vietnamese Coffee Ice Cream Recipe (Ca Rem Ca Phe)
- Cook Time: 15 mins
- Total Time: 6 hrs 15 mins
- Servings: 2
- Calories: 350kcal
2. Ingredients for Vietnamese Coffee Ice Cream Recipe (Ca Rem Ca Phe)
- 1 Vietnamese coffee filter (or any regular coffee filtering device)
- 6 tablespoons dark roast coffee, freshly ground
- 10 ounces sweetened condensed milk
- 3 cups half and half
- 1 teaspoon pure vanilla extract
- 1/8 teaspoon salt
- 1 teaspoon xanthan gum
- 2 teaspoons olive oil
- 1 teaspoon liquid lecithin
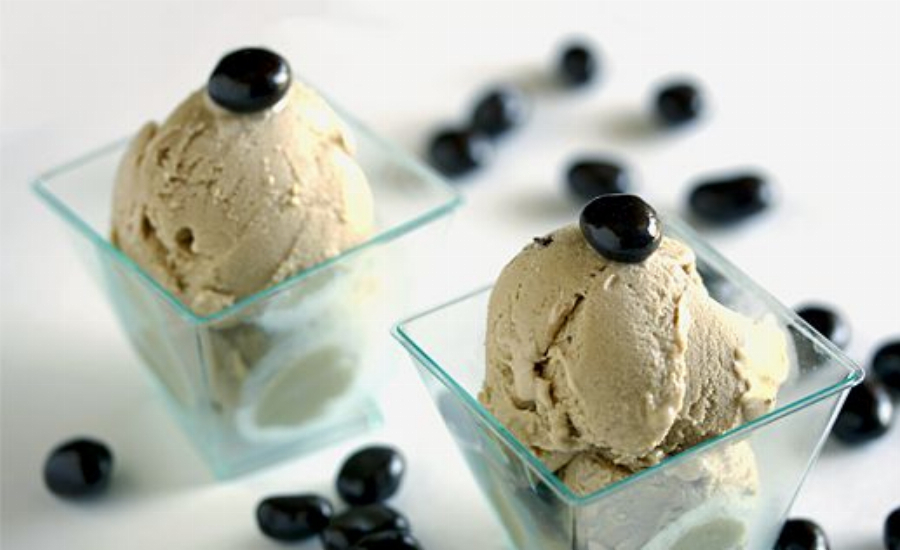
- 2-½ ounces dark chocolate espresso beans
3. Directions:
- On the stove, bring the half and half to a near boil. Add the vanilla extract.
- Divide and pour the sweetened condensed milk into the bottom of 3 tall glasses.
- Put the dark roast, freshly ground coffee in the Vietnamese coffee filter. Tighten the screw of the filter so that the coffee does not escape, then cover with the lid.
- Place the first tall glass underneath the coffee filter. Pour in a little bit of half and half at a time until the coffee is totally submerged and starts dripping. Fill the half and half completely in the filter (make sure you don’t pour too much liquid so it doesn’t overflow). As soon as the glasas is full, transfer the filter to the next 2 glasses.
- You’ll start seeing the condensed milk turning into a caramel color at the bottom. Stir well using a long-stemmed spoon. Make sure the condensed milk is dissolved. Transfer the 3 glasses into a large bowl. Remember, the ice cream mixture should be slightly too sweet to your taste before placing in the ice cream machine because it will taste less sweet when it’s frozen. Add salt and set aside. Let cool to room temperature.
- In a small bowl, combine the xanthan gum and olive oil. Once the mixture turns into a thick paste, add the liquid lecithin. Add the xanthan gum / lecithin mixture to the coffee mixture. The liquid will thicken a bit. Whisk well. Cover and chill in the refrigerator for about 2 hours. To check if the mixture is ready to be churned, the temperature of the liquid shouldn’t exceed 45°F.
- Make sure the ice cream mixture is as cold as possible before you transfer it to the machine.
- Pour the mixture into the ice cream maker canister. Fill up two-thirds of it as the ice cream will expand, and let the machine do its magic. The texture will be on the soft side.
- While the ice cream is churning, reserve a handful of chocolate covered espresso beans and coarsely chop the rest using a sharp chef’s knife.
- Once the ice cream is ready (soft-serve), transfer the ice cream onto a slab of marble (previously placed in the freezer to keep the ice cream chilled). Sprinkle with chopped espresso beans, then fold the ice cream using 2 spades (I used dough scrapers).
- Transfer the ice cream into an airtight container in the freezer to harden for at least 2 hours, preferably overnight.
- When you’re ready to serve, garnish with whole chocolate coffee beans.
- Serve immediately. I served the ice cream with coconut macaroons on the side.
- Bon appétit!
)